Arduino hello world
06 Nov 2015
Using an Arduino board with a GNU/Linux personal computer has become pretty straightforward. The following command will install the required software:
sudo aptitude install arduino-mkIn order to get the file-system permissions to use the USB-serial it is necessary to add the current user to the dialout group. It is necessary to log out and back in after this.
usermod $USER -a -G dialoutFor the Arduino Diecimila you then create a Makefile with the following content (see /usr/share/arduino/hardware/arduino/boards.txt for other supported boards).
ARDUINO_DIR = /usr/share/arduino
BOARD_TAG    = diecimila
ARDUINO_PORT = /dev/ttyUSB0
ARDUINO_LIBS =
include /usr/share/arduino/Arduino.mk
Make sure that /dev/ttyUSB0 is the right device! You can do this by inspecting the output of dmesg after plugging in the Arduino device.
Now you can create a sketch file (ino file extension) for programming the micro controller. E.g. a file Blink.ino with the following content:
int led = 13;

void setup() {
  pinMode(led, OUTPUT);
}

void loop() {
  digitalWrite(led, HIGH);
  delay(50);
  digitalWrite(led, LOW);
  delay(50);
}
Finally compile and upload the code:
make
make upload
The source is available on Github: github.com/wedesoft/arduino-hello-world
Update:
It is also possible to switch the LED according to instructions send over the USB serial channel. The following program facilitates this:
int led = 13;
void setup() {
Serial.begin(9600);
pinMode(led, OUTPUT);
}
void loop() {
char c;
if (Serial.available()) {
c = Serial.read();
if (c == '1') {
digitalWrite(led, HIGH);
Serial.write("LED on\r\n");
} else if (c == '0') {
digitalWrite(led, LOW);
Serial.write("LED off\r\n");
} else
Serial.write("Switch LED on/off using keys '1' and '0'\r\n");
};
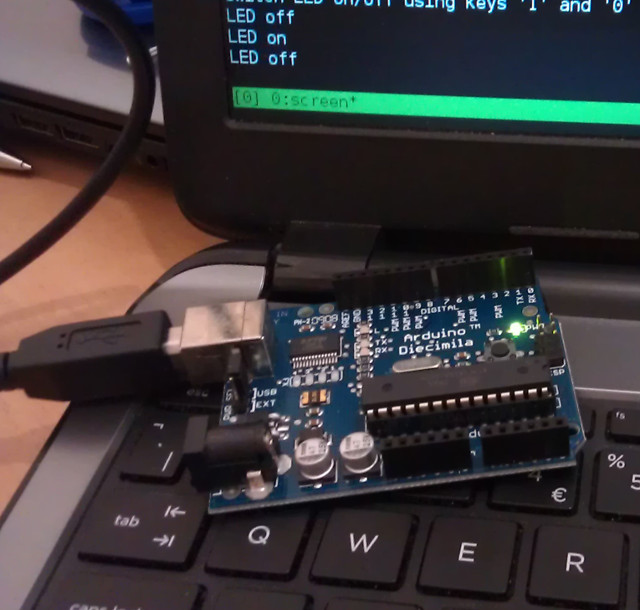
}After opening screen as a serial terminal, the LED can be controlled using keys ‘1’ and ‘0’:
screen /dev/ttyUSB0 9600Exit with Ctrl-A \
See also: